
ERAS Photo Specs Decoded: The Exact Dimensions, File Type, and Size
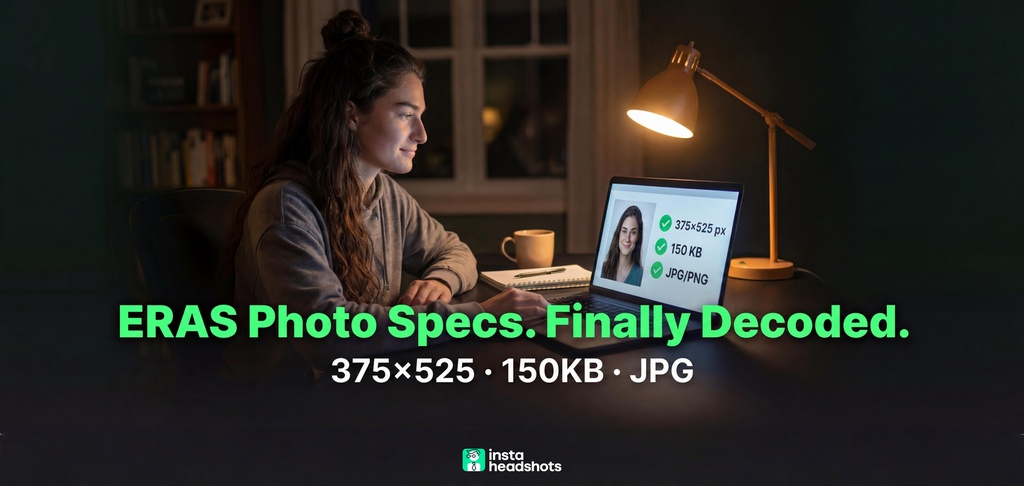
The exact ERAS photo specs: 375 x 525 pixels, JPG/JPEG or PNG, under 150 KB. Get the export recipe and fix blurry, cropped, or rejected uploads in minutes.

I went down a rabbit hole on ERAS photo specs last week, and the data surprised me. Half the guides online cite the wrong file size cap. The other half list pixel dimensions AAMC never actually published.
Here is what I found. Most "ERAS photo problems" have nothing to do with photo quality. They are boring technical mismatches: wrong dimensions, oversized files, and bad filenames. Your headshot can be gorgeous and still upload blurry.
If you are three tabs deep, MSPE half-done, and staring at a cropped preview at 1 a.m., I get it. You do not have time or money for a reshoot.
So let me nerd out on this for a second and give you the exact numbers, an export recipe, and a troubleshooting checklist. The full ERAS photo guide goes even deeper, but this will get you compliant fast.
The Exact ERAS Photo Specs (TL;DR)
Here is the whole spec in one card. Screenshot this.
- Dimensions: 375 x 525 pixels (2.5 x 3.5 inches at 150 dpi)
- Aspect ratio: 5:7 (taller than wide, portrait)
- File types: JPG, JPEG, or PNG
- Max file size: 150 KB (aim for 100 to 120 KB for a safety margin)
- Resolution: 150 dpi
- Filename: Letters, numbers, dashes, and underscores only. No spaces. Not
.heic.
Here is the part that trips people up. AAMC does not publish pixel dimensions at all. Their official Documents page lists three numbers: 2.5 x 3.5 inches, 150 dpi, and 150 KB max.
The pixel math is mechanical. 2.5 inches times 150 dpi equals 375 pixels wide. 3.5 inches times 150 dpi equals 525 pixels tall. That is your 375 x 525.
AAMC's Photo chapter confirms the format rule directly: "Your Photo must be in JPG/JPEG or PNG format. The maximum file size is 150 KB."
The Conventional Wisdom Is Wrong Here
The popular advice is: "Just upload a professional headshot. ERAS isn't picky." I was skeptical too, until I looked at the numbers.
ERAS is extremely picky. Just in very specific, boring ways. It cares about pixel dimensions, file type, and file size. It does not care whether a real photographer shot it.
Okay, but here's where it gets interesting. A lot of "trusted" guides are flat-out stale. I pulled specs from several photographer and studio sites and cross-checked them against AAMC.
| Source | Cites | AAMC Actually Says |
|---|---|---|
| AAMC Documents page | 2.5 x 3.5 in, 150 dpi, 150 KB | Authoritative |
| AAMC Photo chapter | JPG/JPEG or PNG, 150 KB | Authoritative |
| Some 2026 photographer blogs | "JPEG only" | JPG/JPEG or PNG |
| Older retouching guides | 100 KB max | 150 KB max |
| Older studio guides | 300 x 450 px | 375 x 525 px |
Why the divergence? The old 100 KB cap came from the previous ECFMG/OASIS upload pipeline. Some guides never updated when ECFMG moved to MyERAS. Others rounded the inch-to-pixel math badly.
The fix is simple. Default to the strictest safe read: JPEG, 375 x 525 px, under 150 KB. That passes every version of the spec.
Why Your Photo Looks Blurry or Cropped (Even After It Uploads)
Here's the part that surprised me most. An upload that "succeeds" is not proof your photo is fine. I found three separate ways the MyERAS portal makes a compliant file look broken.
Failure 1: Blurry after upload. This is the classic one. A USMLE Forums thread documents an applicant uploading a 758 KB DSLR JPEG. MyERAS compressed it server-side down to 150 KB, and it came out blurry with visible artifacts.
The portal's compressor is a black box. It does not optimize for faces, and it does not tell you it ran. If your file is over 150 KB, you are handing it to that compressor.
Failure 2: Head cut off in the preview. This one causes panic. Studio Red Leaf explains that the MyERAS preview crops to a display box. Your actual file is preserved, and programs see the full image.
So do not re-crop to "fix" the preview. That is how one applicant accidentally cropped their head too tight and got flagged for composition.
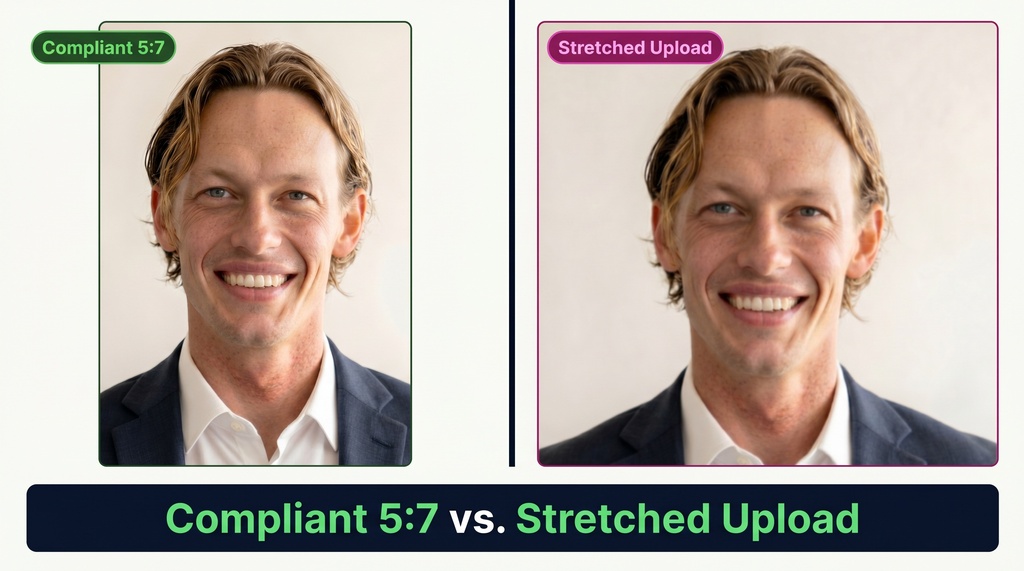
Failure 3: Weird stretch. A Reddit thread shows applicants uploading a 5:7 photo and seeing it stretched to 3:4 in the thumbnail. That is a CSS display quirk, not a file defect.
The common thread across all three: trust the file, not the preview. The preview is a UI. Your file is the truth.
Aspect Ratio Is Where Photos Quietly Fail
When I broke this down, one variable mattered more than the rest: aspect ratio. ERAS wants 5:7, which is taller than most cameras produce by default.
Here is how common ratios stack up:
- ERAS wants: 5:7 (0.71 wide-to-tall)
- DSLR default: 2:3
- iPhone default: 4:3
- Square screenshot: 1:1
Platforms crop by shape, not by file size. A square or 4:3 source gets stretched or clipped when squeezed into a 5:7 frame. I break this down more in my headshot dimensions guide, but the rule is simple: resize to 5:7 before you upload, or expect surprises.
The Export Recipe (Resize First, Then Compress)
This is the single most important workflow rule, and almost everyone gets the order backwards. Resize first. Compress second.
Why? Compression cannot shrink a file below a quality floor. If you compress a 4000 x 3000 px photo to 150 KB first, you get a tiny, blurry postage stamp. IMGPrep calls this the most common mistake applicants make.
Compression is more efficient at lower resolution. So shrink the pixel count first, then squeeze the file size.
Here is my go-to recipe using free tools.
Squoosh (free, browser-based):
- Open squoosh.app and drag your photo in.
- In the Resize panel, set width to 375 and height to 525.
- Turn on Compress and pick MozJPEG or JPEG.
- Set quality to 75 to 85.
- Watch the file size in the corner. When it is under 150 KB (target ~120 KB), download.
Mac Preview (built-in, offline):
- Open the photo in Preview.
- Tools > Adjust Size. Set width 375, height 525, resolution 150.
- File > Export. Format JPEG, quality slider around the middle.
- Save with a clean name like
ERAS_Photo_Smith_John.jpg.
If you only need to shrink a file that is already the right shape, TinyJPG typically halves the size. For editing an existing shot before export, my headshot editing guide walks through cropping and sharpening.
Troubleshooting: The Five Failures and Their Fixes
I organized these by how often they happen. Match your symptom, apply the fix.
| Symptom | Cause | Fix |
|---|---|---|
| Upload rejected (too large) | File over 150 KB | Resize to 375 x 525, compress under 150 KB |
| Blurry after upload | Server compressed your oversized file | Reprocess the source at 375 x 525, quality 80 |
| Head cut off in preview | CSS display crop | Ignore the preview if the file is correct |
| Stretched or weird crop | Source not 5:7 | Resize source to exact 375 x 525 |
| Silent upload fail | Bad filename or HEIC | Rename, convert to JPG |
A couple of extra notes from the research.
HEIC files fail. iPhones save as HEIC by default. AAMC only lists JPG, JPEG, and PNG. Convert before uploading. A filename like IMG_4032(1).HEIC can fail silently.
Social media screenshots are a trap. A screenshot from Instagram or LinkedIn can be a PNG wrapper around JPEG-compressed pixels. Use an original source instead.
Quality too low at 150 KB? Drop the dimensions slightly, to 360 x 504 px, and re-compress at higher quality. That is still compliant and gives you file-size headroom.
To verify before upload takes 30 seconds:
- iPhone: Photos app, tap the photo, tap the "i" icon or swipe up for dimensions. Files app, long-press, Info for size.
- Android: Open photo, three-dot menu, Details.
- Windows: Right-click, Properties, Details tab shows dimensions and size.
- Mac: Select file, press Cmd+I.
What If You Don't Have a Headshot Yet?
Here's the honest breakdown. You have three routes, and the right one depends on your deadline.
Photographer: Highest identity match and best composition. Costs roughly $150 to $400 and takes days. Only realistic if you have a week or more.
AI headshot: Fast and cheap. You upload selfies and get a professional-looking, correctly sized JPG. Identity fidelity is good but not perfect, so review the preview.
DIY: Free. Shoot against a plain wall with good light. Risky on composition, but workable if you follow the spec carefully.
AI headshots have moved from a fringe option to a mainstream fallback, partly because the 150 KB cap rewards a compressed digital file that AI tools output natively. Something like InstaHeadshots turns 10 selfies into professional headshots in as little as 15 minutes, starting around $49, with medical-friendly styling like scrubs and coats. That is a fraction of the roughly $300 and half-day a studio session takes.
AI works great for most applicants. But if your interviews are virtual, prioritize identity match so the program director recognizes you at the door.
Whatever you pick, the caveat is the same. AI output can drift on specs. Always open the delivered file and verify: 375 x 525 px, under 150 KB, JPG or JPEG. Even the best platforms need this manual check. Our free ERAS Photo Checker does that check for you in seconds.
A Note on Composition
AAMC points to the US Department of State photo template for composition. Head height should be 1 to 1 3/8 inches, which is 50 to 69 percent of image height.
Other basics: face centered horizontally, eyes at about 56 percent of image height, plain white or off-white background, neutral expression, and no glasses since 2016.
The photo's job is not to win a beauty contest. It just needs to be compliant and recognizably you. That is the whole bar.
The One-Minute Checklist Before You Submit
Here is my final pre-submit sequence. Run it every time.
- Resize to 375 x 525 px (5:7).
- Compress to under 150 KB at JPEG quality 75 to 85.
- Save as
.jpg,.jpeg, or.pngwith a clean filename (letters, numbers, dash, underscore). - Verify dimensions and size on your device.
- Upload, then treat any weird preview as a display quirk, not a file defect.
And one more thing to calm the last-minute anxiety. AAMC has not signaled any photo-spec change for the 2027 ERAS cycle. Any "new ERAS photo rules" you see floating around social media is likely stale or AI-generated noise.
ERAS photo success is a specs problem, not a photography problem. Get the three numbers right, sanity-check the preview, and move on to the parts of your application that actually need your attention.